How to apply microcement on old tiles: step by step
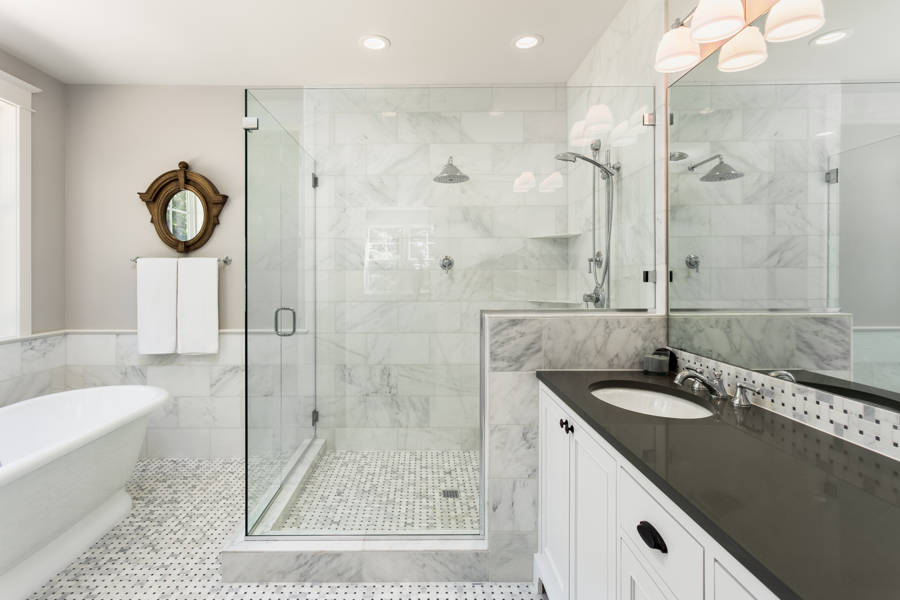
Themicrocementit is the best decorative coating to renovate old tiles because it is a material with great adherence and, above all, because it allows to reform and cover the tiles quickly and without construction.
An added value that not all market coatings offer and that have skyrocketed the use of smoothed microcement over bathroom and kitchen tiles. One of the most demanded decorative solutions in recent years by both individuals and professionals from decoration and construction companies.
In this article, we will address the main advantages of using microcement as a continuous coating to renovate tiles as well as the most important tips for successfully applying smoothed microcement over tiles.
Advantages of applying microcement over tiles
1. The microcement is applied over the existing tiles without works
The main benefit of microcement is its excellent adhesion and compatibility with all types of materials, including tiles which is the topic that concerns us today. In this way, the microcement is applied directly onto the tiles without the need to remove them.
This causes it not to be necessary to carry out works to demolish the tiles and, as there is no need to clear rubble, no waste is generated with the consequent saving of time and inconvenience, both for the owner of the house or premises and for the neighbors.
2. The microcement on the tiles modernizes the rooms
Likewise, by applying the microcement over the old tiles, it quickly modernizes and transforms spaces, completely changing the design of the rooms. Multiple finishes are possible thanks to the extensive variety of textures, varnishes and colors of microcement available.
3. Possibility of anti-slip and waterproof finishes of microcement on tiles
Some types of latest generation microcements confer anti-slip finishes by themselves which are very useful, especially when betting on smoothed microcement to renovate the bathroom floor tiles or the kitchen floor tiles.
It is the case of some of the microcements thatwe manufacture at Topciment,that guarantee continuous non-slip pavements where falls and slips have no place. Although we also have varnishes and sealers that have such properties.
Another advantage of applying microcement over old tiles is that waterproof finishes can be achieved. The bathroom, for example, is a room that constantly suffers from environmental humidity and, therefore, not any decorative coating is suitable.
At Topciment we have designed specific varnishes with which to seal the tiles of the bathroom wall or the tiles of the shower wall coated with microcement. Varnishes of the highest quality with which the smoothed microcement will perfectly resist environmental humidity and running water (not stagnant).
Microcement is perfect for coating bathroom and kitchen tiles
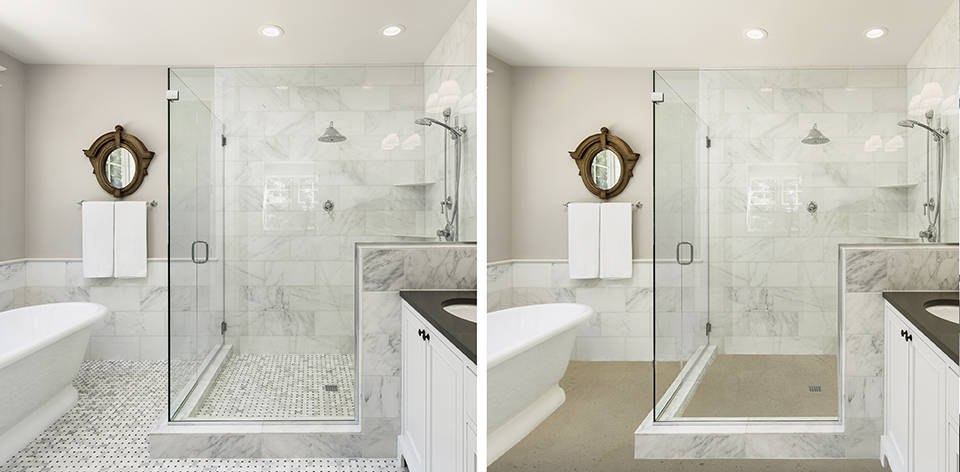
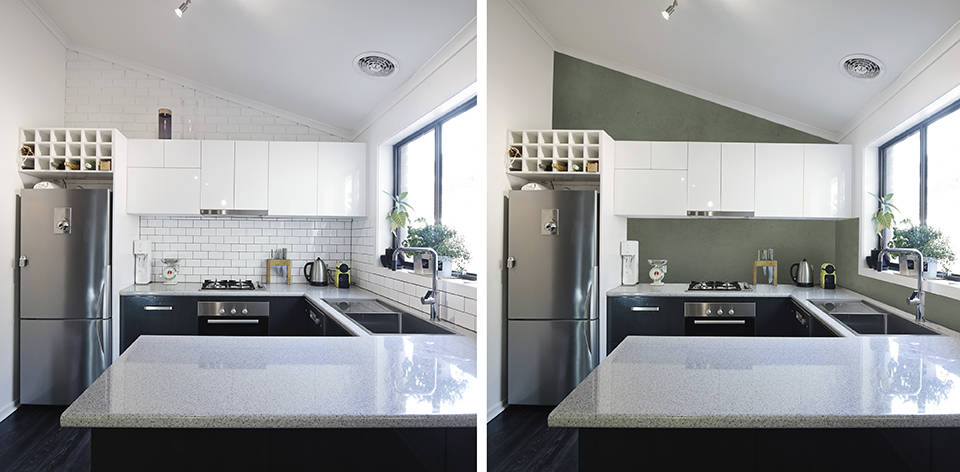
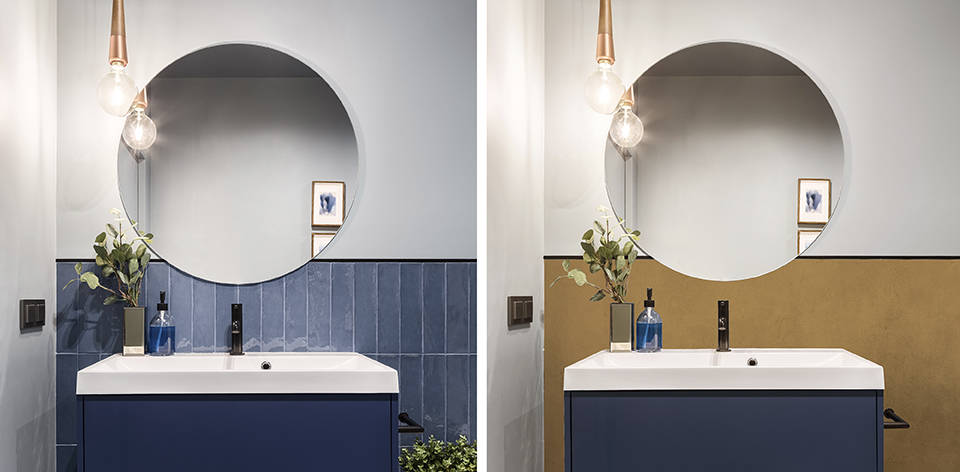
As you have been able to verify, the advantages of applying microcement over tiles make this continuous coating the ideal one to cover the bathroom and kitchen tiles. Qualities to which must be added the easy maintenance and cleaning of the smoothed microcement.
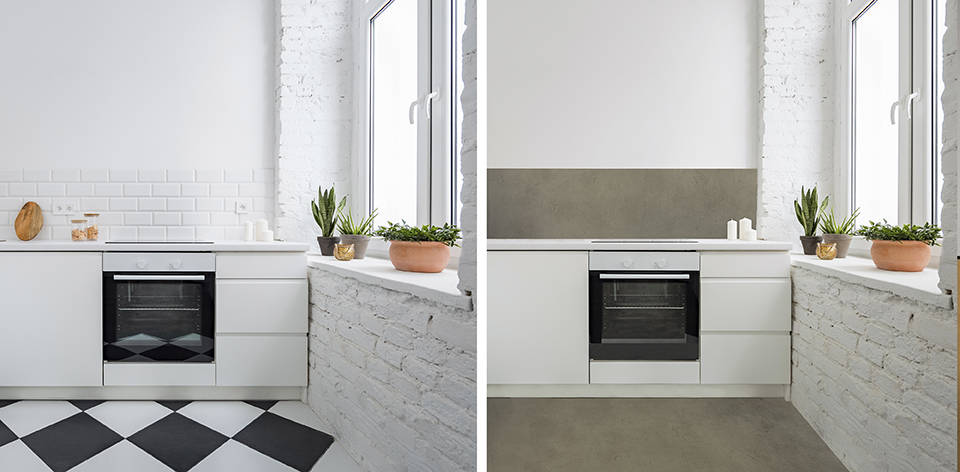
Next, we show you the before and after of some works in which microcement has been applied over old tiles.
Renovating old tiles with microcement: application and advice
To apply microcement over tiles it is essential to have a professional and qualified applicator who does a good job, like the microcement installers who work with our microcements.
Only this way you won't have to regret algunos de los problemsmore frequent that are a consequence of mistakes in the application of microcement.
8 steps to apply microcement over tiles
1. Evaluate the state of the tiles
The first thing to do before applying microcement directly onto old tiles, is to check the condition of the tiles. Since if the tiles on the floor or wall have any imperfection, they cannot be coated with microcement as if nothing. The substrate will need to be repaired before placing our smoothed microcement. Hence the importance of the renovation being carried out by a professional, because they will know how to locate these defects.
2. Clean the tiles before applying microcement
After repairing the tiles, in cases where it is necessary, it is necessary to thoroughly clean the tiles before applying smoothed microcement so that there are no fats or dust.
3. Fill the tile joints with microcement
Once the wall or floor where the tiles are located are clean, it's time to get to work. The first proper step in the application of microcement over tiles consists of filling the joints. Since smoothed microcement is a continuous coating and, therefore, if the joints of the tiles are not filled the support that will serve as a base will not be stable and there will be unevenness that mark the joints.
4. Prime the tiles that are going to be coated with microcement
When the surface is leveled and the tile joints are perfectly filled, it will be the turn to apply the corresponding primer or adhesion promoter. A fundamental product since it acts as a bridge between the tiles and the microcement, so that the latter adheres better.
At Topciment we have manufactured a wide range of primers depending on the surface on which the microcement is applied. In this case, which is about tiles, our experts advise using one of these two: Primapox®100 Barrier or Primacem Plus. We are going to develop both so you know which one to use on each occasion.
Primapox®100 Barrier A + B is our anti-humidity epoxy primer that blocks moisture by capillarity and acts as a vapor barrier. A 100% solid and two-component adhesion promoter that is perfect for shower wall tiles or bathroom floor tiles. An innovative product that also prevents the tracing of joints in microcement.
On the other hand, you can also use Primacem Plus, our specific primer for non-absorbent surfaces such as tiles and which is applied in a single coat.
5. Place fiberglass mesh in the first layer of microcement over tiles
After allowing the appropriate drying time (refer to technical sheets), we will place the fiberglass mesh over the tiles before applying the microcement to protect the future coating and prevent cracks, fissures, etc. A step that not everyone takes into account and that later becomes a big headache.
Next, the first layer of base microcement (Microbase) without pigment will be applied over the tiles. Once the tiles are well covered by the microcement, without irregularities, the support will be sanded.
6. Apply second layer of microcement base on the tiles
Apply the second layer of microcement base (Microbase). This time it will have to be pigmented with the color of microcement that has been chosen to cover the old tiles. In the same way as in the previous step, the surface will have to be sanded.
7. Apply two layers of Microdeck or Microfino microcement on tiles
After the base microcement, two layers of Microdeck microcement or two layers of Microfino should be applied over tiles. The former is usually used for floors and the latter for walls. Although depending on tastes, preferences and finishes sought, combinations can be made. Both hands will already be pigmented. Then, sand.
8. Protect and seal the microcement over tiles
The last step is one of the most important. It is about protecting the microcement coating on tiles. For this, we have all kinds of varnishes and sealers. Although on this occasion, we recommend using two coats of Presealer and another two coats of Topsealer WT One Coat
Tips and recommendations for covering tiles with microcement
1. Respect drying times
In the case of using a primer for non-absorbent surfaces like Primacem PLUS, it is very important that when coating with microcement the tiles respect the drying time. If the instructions and drying times specified in the technical sheets are not strictly followed, moisture will be trapped between coats and therefore the tile joints will be marked.
With this advice, you will avoid making the most common mistake when applying microcement on tiles. A possible error that is avoided by using the Primapox®100 Barrier primer, for which it is not necessary to be so meticulous with drying times due to its ability to block moisture by capillarity.
2. Allow to dry for 24 hours before applying the second coat of microcement
Another recommendation from Topciment experts, in the case of also using Primacem PLUS, is to leave a period of 24 hours of drying between the first and second layer of microcement base.
A process that not everyone does as it is not mandatory, but with which the professional ensures that there are much fewer chances of the joints being marked by an error in the application of microcement on tiles. With Primapox®100 Barrier it will be done with the normal system. That is, applying the second coat of Microbase immediately after the first.
3. Prime the tiles before applying the second coat of microcement
We also recommend that 24 hours after applying the first coat of microcement, more than enough time for it to have dried properly, re-prime the microcement that coats the tiles with Primacem PLUS.
A tip aimed only at the most expert applicators and thanks to which it will be achieved to equalize the level of absorption of the next application hands of microcement on tiles. An equality with which the visual marks of the joints that have different absorption points are drastically reduced.
Subscribe to our newsletter
Receive in your email tips for the application and care of microcement, the latest trends and news from Topciment products.


