How to avoid unwanted stains or marks when applying microcement
A poor application of microcement can lead to the appearance of unwanted stains and marks. Visual problems that harm the final finish. If you've made it this far, it's because you're concerned about this circumstance and, above all, because you want to know how you can avoid them at all costs.
You're in the right place. In this article, we will not only dive into the most common reasons that cause those dreaded marks and stains due to a poor installation of smoothed microcement.
In addition, our experienced applicators will give you a series of tips, advice, and solutions to each one of the problems so that unwanted imperfections do not appear. Take note!
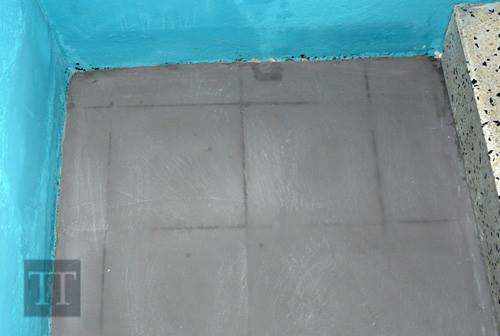
Marks of the tile joints when applying microcement
Do you want to apply the microcement over tiles? These are the three points to consider to prevent the joints of the tiles from marking.
1. Pay attention to the absorption difference between tiles and joints
The resin contained in the microcement is absorbed differently. If no precautions are taken, we run the risk of it appearing in the form of a visual spectrum when drying (visual pattern). Moisture in the joints also causes this defect.

2. The joints of the tiles are usually hollow
The joints are generally hollow, they are not on the same plane as the tile. Likewise, the shrinkage of the Microcement once dry creates a relief in the joint area (raised pattern). Because of all this, with our microcement systems we create a layer that isolates and levels.
3. Allow to dry for 24 hours before applying microcement
It is very important that, after filling the tile joints, it is allowed to dry for 24 hours before starting with the application of the microcement base.
Trowel marks on the microcement
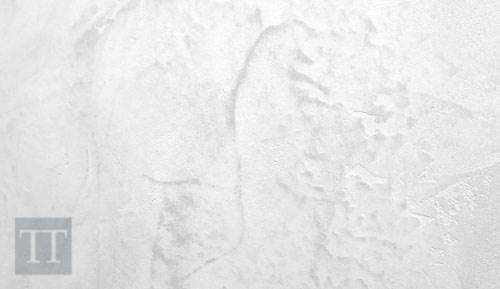
We will have to apply the microcement without leaving burrs or reliefs that show the passage of the trowel, sanding these imperfections in each hand. If we apply microcement on a layer with burrs, these reliefs will be copied.
With the steel trowel and an excess of pressure, these imperfections cause the "burned" effect, dark spots that reflect the lack of sanding of the lower layer of microcement.

Irregularities surface microcement
After each layer of microcement is applied, the surface must be sanded. A non-negotiable step to avoid the effect described in the previous section. We will perform a gentle grinding with a low-speed roto-orbital sander or by using a sanding glove, and silicon carbide sandpapers.
Approximately 3 hours after the application of the smoothed microcement, a change in the coating's tone is noticeable, becoming lighter. A change in tone that indicates that the microcement is walkable and hard enough to proceed with sanding. It should be noted that temperature, ambient humidity, and room ventilation influence this time frame.
We recommend sanding before 12 hours after the application of the microcement so that the coating has not reached excessive hardness and this step is more complicated.
Microcement stains due to excessive sanding
When we carry out the sanding of the last layer of microcement, we must ensure to work the material gently. With one hand we will take the sander or the sanding glove and with the other we will check by touch if the sanding is correct. If we work the surface properly we will avoid three types of characteristic stains: circles, contour lines and black marks.
The sander will have to be of the roto-orbital type to avoid leaving circles. We will try to keep it moving constantly without focusing for a prolonged time in the same place. If the sanding was excessive we would end up seeing the smoothed microcement from the previous layer and leaving characteristic "contour curves" that would indicate that we have moved to the lower layer. As soon as the sandpaper wears out we will have to change it, if we do not make the change, the sandpaper goes from sanding to polishing leaving black marks on the microcement.
Microcement brands due to excessive burnishing
If the microcement finish is not as desired, the most appropriate thing is to apply an additional layer of smoothed microcement. Since making touch-ups on the already dry surface will leave noticeable and very unattractive marks.
Over-reviewing an area with the trowel will leave dark marks. This can happen, for example, when material accumulates on floors at the end of the application path, forcing us to collect the leftover smoothed microcement and work it more with the trowel.
If you overwork an area, what you do is force it to dry. This problem is reflected in the whitening of the area. For example: A black wall could have grey stains much lighter than the chosen microcement colour.
If the applicator goes over the entire surface too much or presses the smoothed microcement support too hard, it can turn a lighter color. It is very typical to see a black wall that looks gray.


